

Additional information
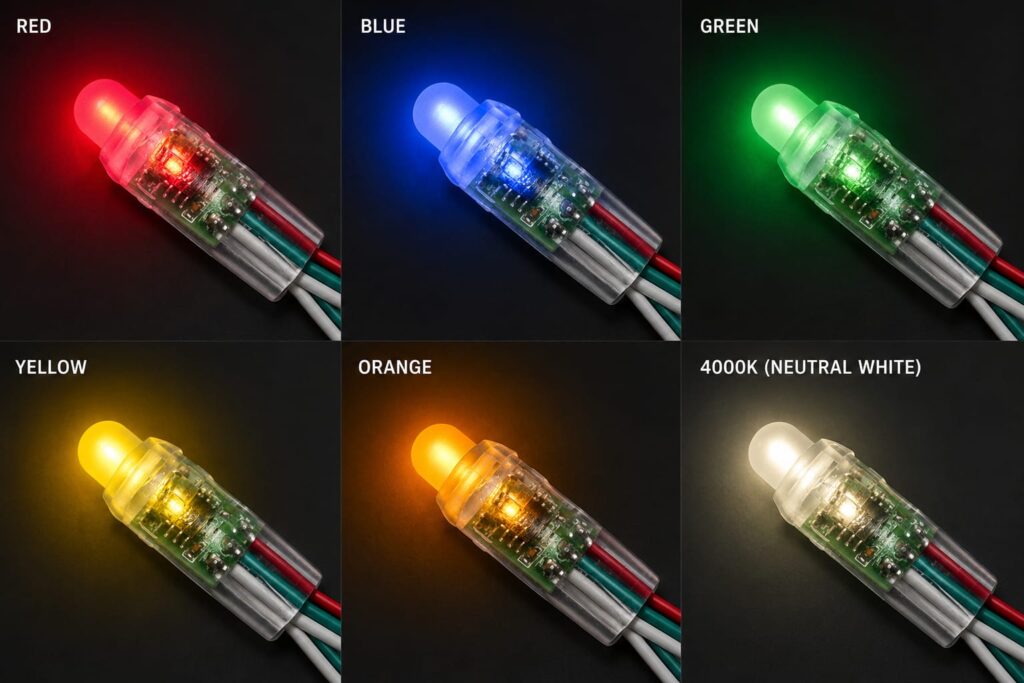
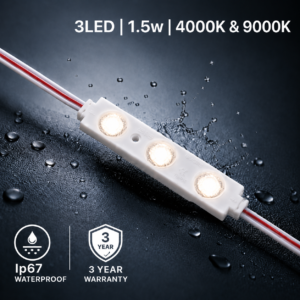
| Colour | Red, Blue, Green, Yellow, orange, 4000k, 9000k |
|---|


* Actual products may vary slightly due to continuous design enhancments.
| Qty Of Modules | Power Supply Required |
| 0-25 | 36W Power Supply |
| 26-50 | 60W Power Supply |
| 51-100 | 120W Power Supply |
| 101-130 | 150W Power Supply |
| 131-180 | 200W Power Supply |
| 181-380 | 400W Power Supply |
To ensure a safe and reliable installation, you'll need the following components:
Using the correct power supply and suitable wiring will help ensure consistent performance and reliable operation of your 5V 9mm Pixel Lights.

5V Various Colours
Online Price:
R275.00 Original price was: R275.00.R250.00Current price is: R250.00. Vat Incl.
| Input | 5V DC |
| Output | 0.15W |
| Lumens | N/a |
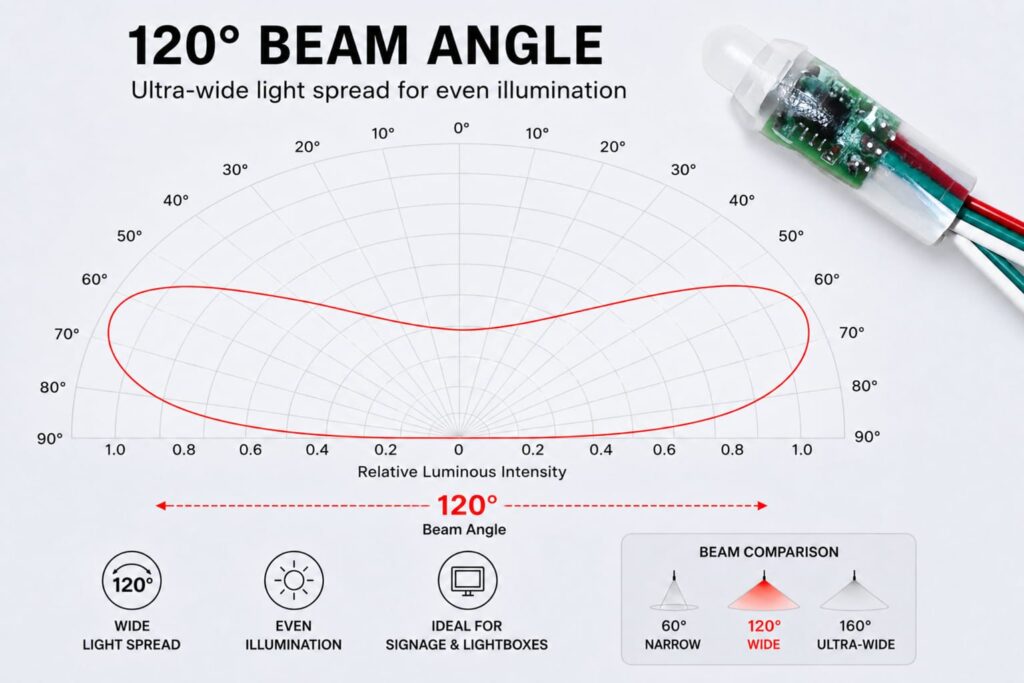
| Beam Angle | 120° |
| Colour Temperature | 9000K-11 000K |
| Maximum per String | 50 Pixels |
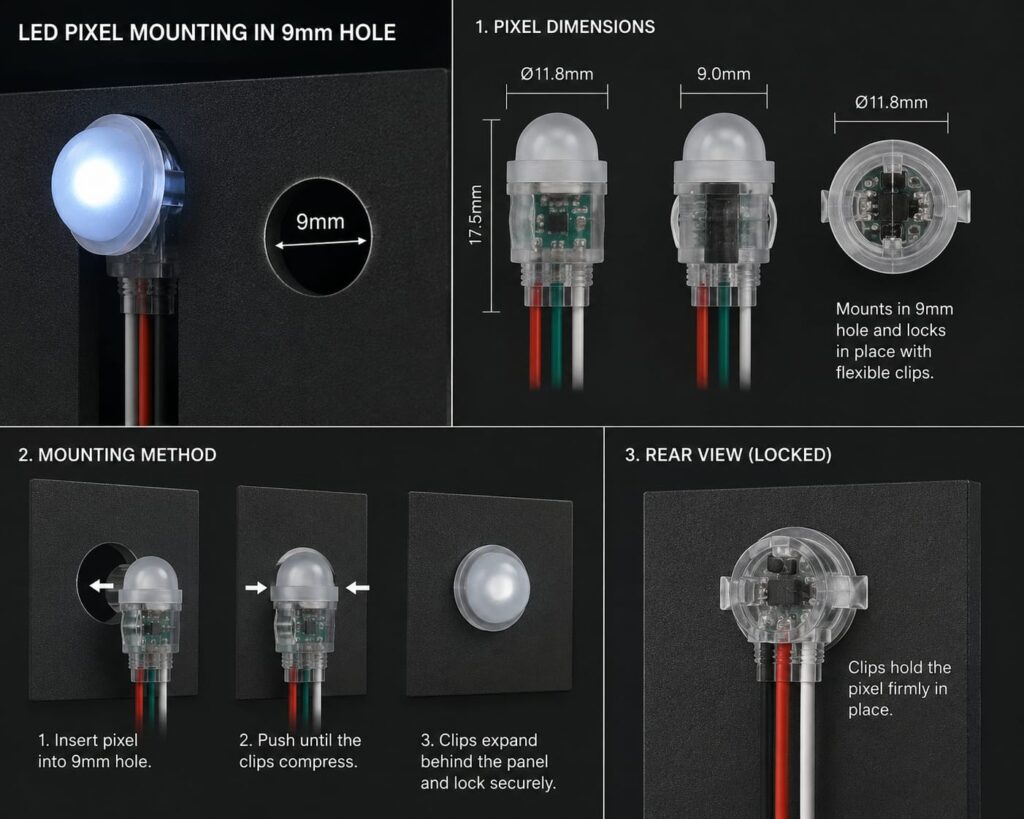
| Dimensions | 17.5mm x 11.8mm x 9mm |
| Mounting | Through Hole |
| IP Rating | IP67 (Waterproof) |
| Warranty | 3 Year |
50 in stock




| Qty Of Modules | Power Supply Required |
| 0-25 | 36W Power Supply |
| 26-50 | 60W Power Supply |
| 51-100 | 120W Power Supply |
| 101-130 | 150W Power Supply |
| 131-180 | 200W Power Supply |
| 181-380 | 400W Power Supply |
To ensure a safe and reliable installation, you'll need the following components:
Using the correct power supply and suitable wiring will help ensure consistent performance and reliable operation of your 5V 9mm Pixel Lights.
Frequently Asked Questions
What accessories do I require for a basic Pixel Light installation?
For a basic installation you will generally require 1 × 5V 9mm Pixel Lights, 1 × compatible 5V DC power supply, a power cord, suitable low-voltage cable, and wire connectors where required. Connect the Pixel Lights to the correct 5V power supply, check all connections, and then connect the power supply to the mains.
Are there any optional accessories I may need?
Depending on your installation, you may also require insulated cable, wire connectors, waterproof junction boxes for outdoor installations, mounting accessories, and silicone sealant where additional weather protection is required.
What voltage power supply should I use?
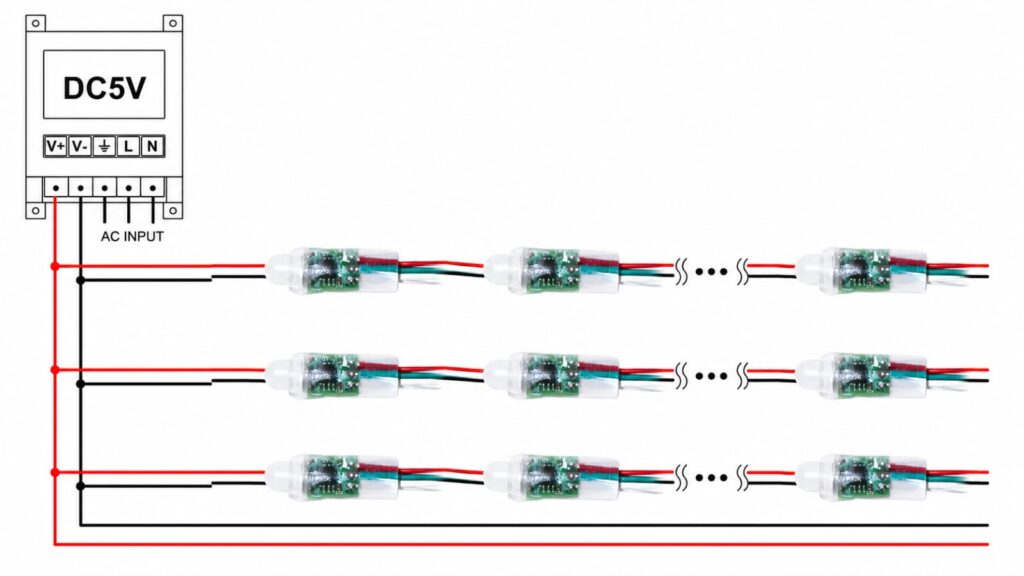
Always use a 5V DC Power Supply with our 5V 9mm Pixel Lights. Never connect Pixel Lights directly to 230V AC mains power.
How do I calculate the correct power supply size?
Multiply the number of Pixel Lights by the wattage per pixel, then allow at least 20% spare capacity. For example, if 50 pixels use 0.3W each, the total load is 15W. With 20% spare capacity, a power supply of at least 18W would be required, so a suitable 20W power supply could be used.
Where are 5V 9mm Pixel Lights commonly used?
5V 9mm Pixel Lights are commonly used for through-hole signage, illuminated lettering, 3D channel letters, acrylic and Perspex signs, illuminated logos, retail signage, commercial signage, and custom sign installations.
Can I install Pixel Lights myself?
Yes. Pixel Lights are designed for straightforward low-voltage installation and can be used by DIY users and professional sign installers. Always use the correct power supply and disconnect mains power before making any electrical connections.
Can I receive an electric shock?
The 5V DC output from the power supply is low voltage, but the mains input to the power supply can cause serious electric shock. Always complete and check the low-voltage wiring before connecting the power supply to the mains. If you are unsure about mains wiring, consult a qualified electrician.
Can Pixel Lights be used outdoors?
Only use Pixel Lights outdoors if the specific product is rated for outdoor use. Suitable waterproof connections, cabling, and a correctly rated power supply should also be used. Always check the IP rating of the specific product before outdoor installation.
Can I cut or separate the Pixel Lights?
This depends on the specific Pixel Light design. Do not cut or modify the pixels unless the product is specifically designed to be cut or separated. Follow the manufacturer's wiring and installation instructions.
How are Pixel Lights mounted?
5V 9mm Pixel Lights are installed through holes drilled into the sign face. The pixels are positioned and secured within the holes to provide consistent illumination across the sign.
Can Pixel Lights be dimmed?
This depends on the specific Pixel Light. If the product supports dimming, use a compatible 5V LED dimmer or controller that is correctly rated for the installation.
How far apart should Pixel Lights be spaced?
Spacing depends on the size and depth of the sign, the desired brightness, and the required illumination. Pixel spacing should be planned to provide even coverage without visible dark areas. We recommend testing the spacing and layout before permanently installing the pixels.
5V 9mm Pixel Light Installation & Setup
Installing 5V 9mm Pixel Lights is straightforward when the correct components are used.
Step 1: Plan Your Installation
Determine the number of pixels required and calculate the total wattage to select a suitable 5V DC power supply with at least 20% spare capacity.
Step 2: Prepare the Sign Face
Mark and drill the required holes according to the pixel size and spacing. Ensure the surface is clean, dry, and free from dust or grease.
Step 3: Position the Pixels
Insert the 9mm Pixel Lights through the drilled holes, spacing them evenly to achieve consistent illumination.
Step 4: Connect the Pixels
Connect the pixels to the 5V DC power supply, ensuring the correct polarity (+ and –). Follow the manufacturer's recommended wiring and maximum pixel quantity.
Step 5: Test Before Securing
Power the pixels briefly to confirm that all units illuminate correctly before completing the installation.
Step 6: Secure the Pixels
Ensure each pixel is firmly seated in the sign face and that the wiring is secure.
Step 7: Connect to Power
Connect the 5V power supply to the mains according to local electrical regulations. If you're unsure about mains wiring, consult a qualified electrician.
Installation Tips
Following these steps will help ensure reliable performance and consistent illumination from your 5V 9mm Pixel Lights.
Common Issues & Solutions
Pixel Lights won't turn on
Pixels are dim or unevenly lit
Only some pixels light up
Pixels are flickering
Uneven illumination
Recommendations
5V 9mm Pixel Light Safety Tips
To ensure safe installation and reliable operation, follow these guidelines:
Following these recommendations will help ensure safe installation, consistent illumination, and reliable operation of your 5V 9mm Pixel Lights.
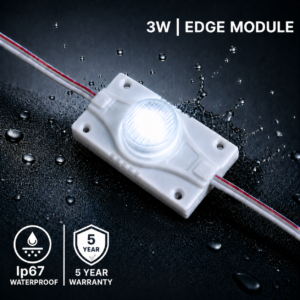
5V 9mm Pixel Lights are designed specifically for through-hole signage, providing bright and reliable illumination for sign faces and lettering.
Common applications include:
Our 5V 9mm Pixel Lights deliver bright, vibrant, and reliable illumination, making them ideal for signage, decorative installations, displays, architectural features, and other creative lighting applications. Designed for compact installations and easy integration, these pixel lights provide excellent flexibility for detailed designs, lettering, outlines, and individually controlled lighting effects. With their small 9mm form factor and 5V operation, they are a versatile solution where precise placement and dynamic illumination are required.
LED Module Dimensions:
Color of LED Module
LED Module Distribution Graph
LED Module Installation
| Colour | Red, Blue, Green, Yellow, orange, 4000k, 9000k |
|---|
WhatsApp us
Reviews
There are no reviews yet.