




Loading...

* Actual products may vary slightly due to continuous design enhancments.

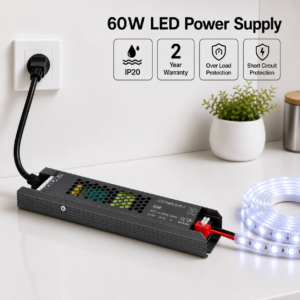
What Power Supply Do I Need?


Strip Light Length (M)Power Supply Required
1-3M60W Power Supply
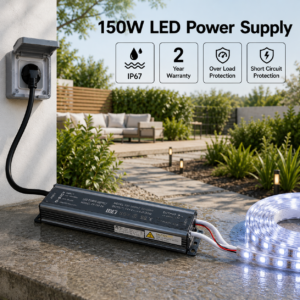
4-7M150W Power Supply
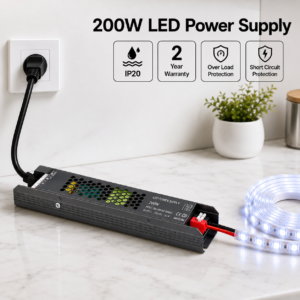
8-11M200W Power Supply
12-17M400W Power Supply
Essential Components

Essential Components for a 12V DMX COB LED Strip Light Installation

To ensure a safe, reliable, and long-lasting installation, you'll need the following components:

  • 12V DC LED Power Supply – Converts mains power to 12V DC and should be sized with at least 20% spare capacity above the total wattage of the LED strip.
  • 12V DMX COB LED Strip Light – Choose the appropriate colour, brightness, length, pixel density, and IP rating for your application.
  • DMX Controller – Required to control DMX512 colour, dimming, effects, and dynamic lighting functions.
  • LED Strip Connectors or Soldering Supplies – Used to join strip sections or create custom wiring connections.
  • Low-Voltage Cable & DMX Cable – Suitable cable for connecting the power supply and DMX controller to the LED strip, particularly for longer installations.
  • Aluminium LED Profile (Recommended) – Provides improved heat dissipation, protects the strip, and creates a professional finish with optional diffuser covers.
  • Mounting Accessories – Clips, brackets, screws, or high-quality double-sided adhesive tape for secure installation.
  • Wire Connectors or Terminal Blocks – Ensure safe and reliable electrical and DMX connections.
  • Heat Shrink Tubing or Insulation – Protects soldered joints and exposed wiring from damage and moisture.
  • End Caps and Silicone Sealant (For Waterproof Installations) – Helps maintain the IP rating after cutting or modifying waterproof strips.

Using quality components, a correctly sized 12V power supply, and a compatible DMX controller will help improve performance, maintain reliable colour control, reduce voltage drop, and extend the lifespan of your 12V DMX COB LED Strip Light installation.

12V COB DMX LED Strip Lights

16w DMX Running Lights

Online Price:
Original price was: R196.00.Current price is: R179.00. Vat Incl.

Unit: Per Metre

PLEASE NOTE: Changing the quantity will duplicate the entire bundle, including all products and quantities within the bundle.

What Power Supply Do I Need?


Strip Light Length (M)Power Supply Required
1-3M60W Power Supply
4-7M150W Power Supply
8-11M200W Power Supply
12-17M400W Power Supply

Essential Components for a 12V DMX COB LED Strip Light Installation

To ensure a safe, reliable, and long-lasting installation, you'll need the following components:

  • 12V DC LED Power Supply – Converts mains power to 12V DC and should be sized with at least 20% spare capacity above the total wattage of the LED strip.
  • 12V DMX COB LED Strip Light – Choose the appropriate colour, brightness, length, pixel density, and IP rating for your application.
  • DMX Controller – Required to control DMX512 colour, dimming, effects, and dynamic lighting functions.
  • LED Strip Connectors or Soldering Supplies – Used to join strip sections or create custom wiring connections.
  • Low-Voltage Cable & DMX Cable – Suitable cable for connecting the power supply and DMX controller to the LED strip, particularly for longer installations.
  • Aluminium LED Profile (Recommended) – Provides improved heat dissipation, protects the strip, and creates a professional finish with optional diffuser covers.
  • Mounting Accessories – Clips, brackets, screws, or high-quality double-sided adhesive tape for secure installation.
  • Wire Connectors or Terminal Blocks – Ensure safe and reliable electrical and DMX connections.
  • Heat Shrink Tubing or Insulation – Protects soldered joints and exposed wiring from damage and moisture.
  • End Caps and Silicone Sealant (For Waterproof Installations) – Helps maintain the IP rating after cutting or modifying waterproof strips.

Using quality components, a correctly sized 12V power supply, and a compatible DMX controller will help improve performance, maintain reliable colour control, reduce voltage drop, and extend the lifespan of your 12V DMX COB LED Strip Light installation.

Frequently Asked Questions


1. What accessories do I require for a basic installation and how do I connect them?

For a general or basic 12V DMX COB LED Strip Light installation, you would require:

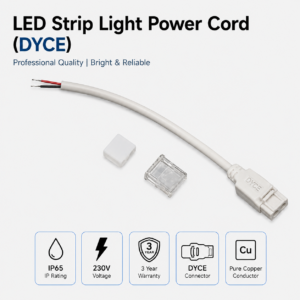
1 × 12V DC Power Supply & Power Cord
1 × DMX512 Controller
12V DMX COB LED Strip Light
Compatible DMX Cable and Connectors

See the installation diagram for guidance on the correct connection method.


2. Are there any other items or optional extras that I may need?

Depending on your application, you may also need:

Aluminium LED Profiles
Insulated 2-Core Flex to extend the cable between the Power Supply and Strip Light
DMX Cable for reliable signal transmission
DMX Connectors or Terminal Blocks
Mounting clips or brackets
Additional double-sided adhesive tape
Soldering supplies and heat shrink tubing for custom connections


3. What Voltage Power Supply would I use?

Always use a Power Supply with the same voltage as the Strip Light.

For a 12V DMX COB Strip Light:


12V Strip Light → 12V DC Power Supply

Never connect a 12V LED Strip Light directly to 230V AC mains power.


4. What size Power Supply would I need?

Calculate the required power using:

Strip Light Length (M) × Power (Watts/M) + 15%

Example:

5M × 10 Watts/M = 50 Watts
50 Watts + 15% = 57.5 Watts

Therefore, a 60W or 75W 12V Power Supply would be sufficient.

For additional headroom and long-term reliability, a slightly larger correctly rated power supply can be selected.


5. What are the benefits of installing Aluminium Profiles?

Aluminium Profiles help to:

Conceal wiring and create a cleaner installation
Act as an additional heat sink
Protect the LED strip from accidental damage and dust
Provide a professional, finished appearance
Help improve the lifespan and performance of the LED Strip Light

When using COB Strip Lights, an aluminium profile can also help maintain a clean, continuous appearance while improving heat dissipation.


6. Can I install 12V DMX COB LED Strip Lights myself?

Yes. The low-voltage side of a 12V LED Strip Light installation is relatively straightforward when using compatible components.

However, any connection of the Power Supply to 230V AC mains electricity should be completed according to local electrical regulations. If you are unsure, consult a qualified electrician.


7. Do you have DIY Kits with everything included?

Yes. We have a variety of DIY Kits designed to simplify LED Strip Light installations and include easy-to-follow instructions for basic applications.

For DMX installations, ensure the kit includes a compatible DMX controller and the required signal connections.


8. Can I shock myself?

The 12V DC output side of the Power Supply is low voltage, so the risk of a dangerous electric shock under normal conditions is significantly lower than with mains electricity.

However, the 230V AC input side of the Power Supply is dangerous. Always complete and check the low-voltage and DMX connections before connecting the Power Supply to mains electricity.

9. Can 12V DMX COB Strip Lights bend around corners or curved shapes?

12V DMX COB LED Strip Lights are flexible and can be used for many curved and decorative applications.

However, they should not be sharply bent, folded or twisted. Always follow the manufacturer's recommended bending radius and avoid putting excessive stress on the PCB, LEDs, or solder joints.


10. Can I cut the Strip Lights?

Yes. 12V DMX COB LED Strip Lights can be cut at their designated cut points.

Always cut directly along the marked cut line using suitable scissors or a sharp blade. Cutting anywhere else may damage the circuit or cause sections of the strip to stop working.

After cutting, ensure the power and DMX connections are correctly reconnected before operating the strip.

For hassle-free installations, our Cut & Solder Customising Service can cut the Strip Lights to your required lengths, solder the connections and test them before installation.


11. How are the Strip Lights mounted?

The Strip Lights feature double-sided adhesive backing for quick and convenient mounting onto a clean, smooth and dry surface.

For a more secure and professional installation, an Aluminium LED Profile or suitable mounting system is recommended where applicable.


12. Can they be dimmed and colour controlled?

Yes. 12V DMX COB LED Strip Lights can be dimmed and controlled using a compatible DMX512 controller.

Depending on the specific strip and controller, DMX control can provide brightness adjustment, colour selection, colour-changing effects, and dynamic lighting programmes.


The DMX controller and power supply must be correctly rated and connected according to the manufacturer's wiring instructions.

12V DMX COB LED Strip Light Installation & Setup

Installing a 12V DMX COB LED Strip Light is straightforward when the correct components are used.


Step 1: Plan Your Installation

Measure the installation area, determine the total strip length required, and calculate the total wattage to select a suitable 12V DC power supply with at least 20% spare capacity. Plan the DMX controller and signal cable routing before installation.


Step 2: Prepare the Mounting Surface

Ensure the surface is clean, dry, and free from dust or grease. For the best performance and longest lifespan, install the strip inside a suitable aluminium LED profile where possible.


Step 3: Cut the Strip (If Required)

Only cut the LED strip at the marked cut points. Cutting elsewhere may damage the strip or prevent sections from operating correctly.


Step 4: Connect the Strip

Connect the strip to the 12V DC power supply and compatible DMX controller using suitable connectors or by soldering wires to the designated connection pads. Always observe the correct power polarity (+ and –) and ensure the DMX signal connections are correctly wired.


Step 5: Test Before Mounting

Power the system briefly to confirm that the strip illuminates correctly and that the DMX controller can select colours, dim the strip, and operate the required lighting effects before permanently fixing it in place.


Step 6: Secure the Strip

Remove the adhesive backing and press the strip firmly onto the mounting surface or into the aluminium profile. Avoid excessive bending, twisting, or folding during installation.


Step 7: Connect to Power & DMX Control

Connect the 12V power supply to the mains according to local electrical regulations and connect the DMX controller according to the manufacturer's instructions. If you're unsure about mains wiring, consult a qualified electrician.


Installation Tips

  • Avoid sharp bends and do not exceed the minimum bend radius.
  • Use aluminium profiles where possible to improve heat dissipation and protect the LED strip.
  • For longer installations, use appropriate power injection points to help minimize voltage drop.
  • Ensure the DMX signal is correctly connected and use suitable DMX cable for reliable communication.
  • Do not power the strip while it is still tightly wound on the reel.
  • Choose an IP-rated strip suitable for the installation environment, especially in damp or outdoor locations.
  • Ensure all DMX and power connections are secure and properly insulated.
  • Always test the lighting effects and DMX control before permanently mounting the strip.


Following these steps will help ensure reliable performance, consistent illumination, accurate DMX control, and a long service life from your 12V DMX COB LED Strip Light installation.


12V DMX COB LED Strip Light Troubleshooting & Recommendations


Common Issues & Solutions

LED strip won't turn on

  • Check that the power supply is providing 12V DC.
  • Verify all power connections and polarity (+ and –).
  • Ensure the power supply is switched on and correctly sized for the total load.
  • Check that the DMX controller is powered and correctly connected where applicable.


Strip is dim or unevenly lit

  • The power supply may be undersized.
  • Excessive voltage drop can occur on longer runs—use appropriate power injection points.
  • Check for loose, damaged, or poorly connected wiring.
  • Confirm that the DMX controller is outputting the correct signal and settings.


Only part of the strip lights up

  • Inspect for cuts, damaged sections, or incorrect connections.
  • Ensure connectors are fully seated or solder joints are secure.
  • Check the DMX signal connection between sections.
  • Test the strip in smaller sections to identify the faulty area.


Flickering lights or unstable colours

  • Check for loose wiring or poor electrical connections.
  • Confirm the 12V power supply is stable and not overloaded.
  • Check the DMX controller, addressing, and signal connections.
  • Ensure the DMX cable and controller are compatible with the strip.


DMX control not working

  • Check the DMX input and output connections.
  • Confirm the correct DMX address and controller settings.
  • Check that the DMX signal polarity and wiring are correct.
  • Ensure the controller supports the required DMX512 configuration.


Adhesive won't stick

  • Clean the mounting surface thoroughly before installation.
  • Install on a smooth, dry, grease-free surface.
  • Use an aluminium LED profile or mounting clips for a more secure, long-term installation.


Recommendations

  • Use a quality 12V DC LED power supply with at least 20% spare capacity.
  • Install the strip in an aluminium profile where possible to improve heat dissipation and protect the LEDs.
  • Avoid bending the COB strip sharply or twisting it during installation.
  • Never power the strip while it is still rolled up on the reel, as heat can build up and damage the LEDs.
  • For longer installations, use appropriate power injection points to maintain consistent brightness.
  • Use a compatible DMX512 controller and suitable DMX cabling for reliable colour and effect control.
  • Select the correct IP rating for your environment—IP20 for indoor dry areas and waterproof versions for damp or outdoor applications.
  • Always test the strip, DMX control, colours, and effects before permanently mounting it.
  • Disconnect the power before cutting, connecting, or servicing the LED strip.


Following these recommendations will help maximise the performance, efficiency, DMX control, and lifespan of your 12V DMX COB LED Strip Light while reducing the likelihood of installation issues.


12V DMX COB LED Strip Light Safety Tips

To ensure safe installation and reliable operation, follow these important safety guidelines:

  • Always disconnect the power before installing, cutting, or modifying the LED strip.
  • Only use a compatible 12V DC LED power supply that is correctly rated for the total wattage of the installation.
  • Choose a power supply with at least 20% spare capacity to prevent overloading.
  • Observe the correct polarity (+ and –) when making power connections.
  • Do not connect the LED strip directly to 230V AC mains power.
  • Never power the strip while it is tightly wound on the reel, as heat buildup can damage the LEDs.
  • Install the strip on a clean, dry, and heat-resistant surface.
  • For the best performance and longest lifespan, use an aluminium LED profile to improve heat dissipation.
  • Avoid excessive bending, twisting, or folding, and only cut the strip at the designated cut points.
  • Keep all power and DMX connections secure and properly insulated to prevent short circuits or signal faults.
  • Use waterproof (IP-rated) LED strips and properly sealed connections in damp or outdoor environments.
  • Ensure adequate ventilation around the power supply and avoid covering it with insulation or other materials.
  • If you're connecting the power supply to mains electricity and are unsure of the wiring, consult a qualified electrician.
  • Regularly inspect the installation for loose connections, damaged cables, or signs of overheating.
  • Keep LED strips, power supplies, controllers, and wiring out of reach of young children and away from flammable materials.


Following these safety precautions will help ensure a safe installation, reliable performance, accurate DMX control, and a long service life for your 12V DMX COB LED Strip Light.

12V DMX COB LED Strip Light Applications & Use Cases

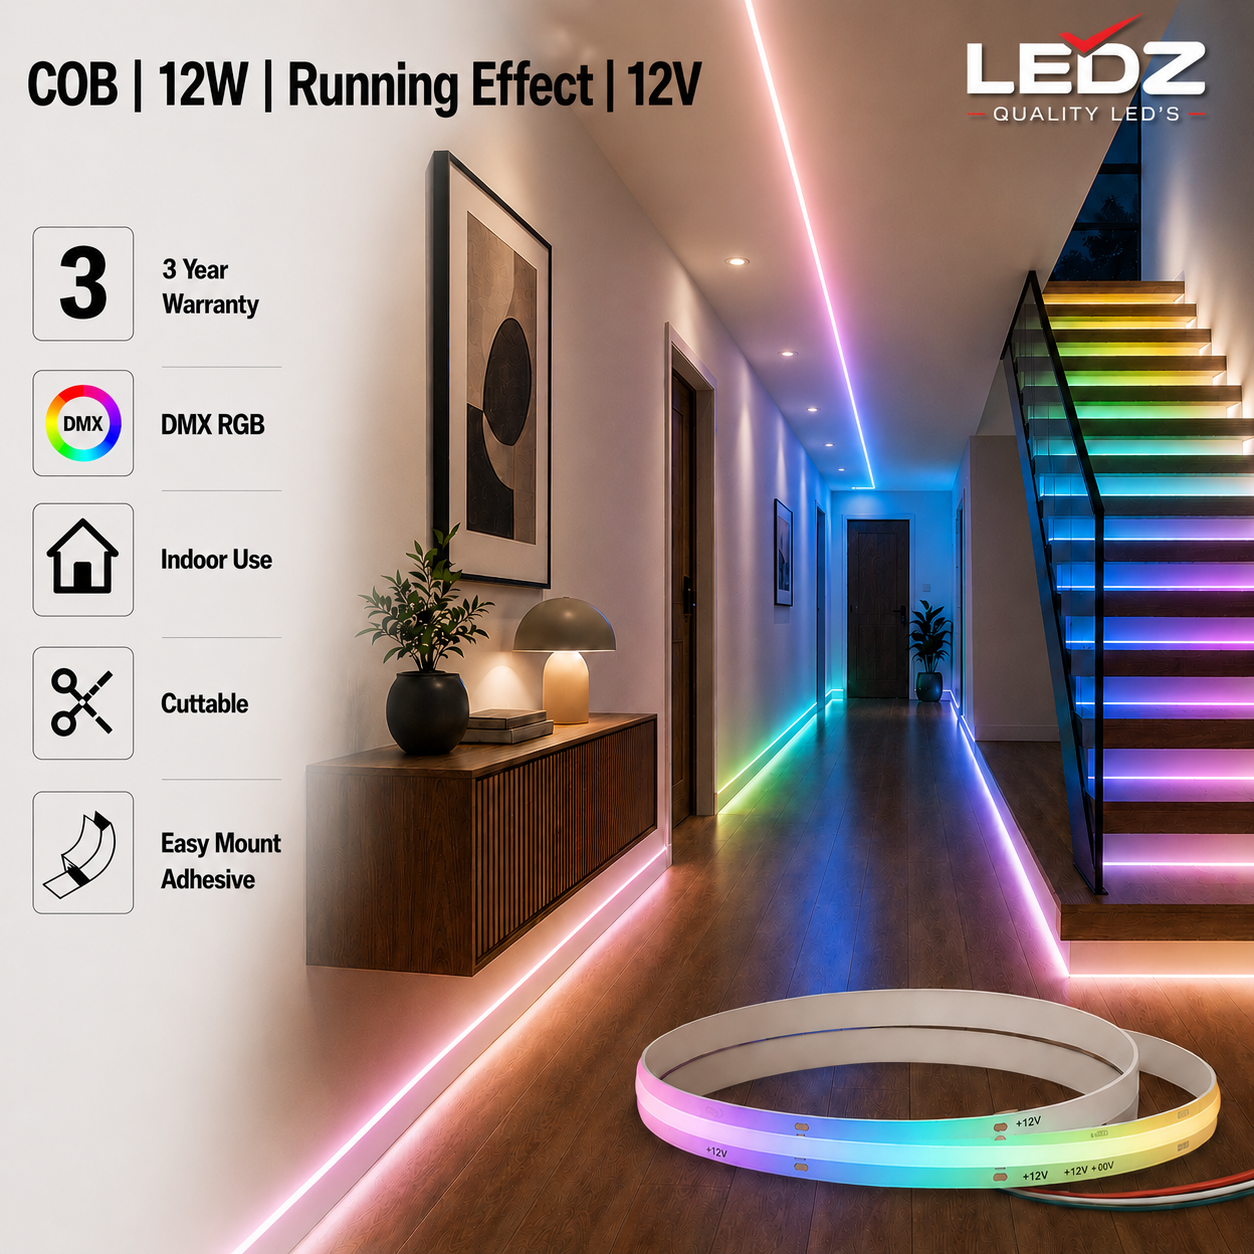
12V DMX COB LED Strip Lights are a versatile lighting solution suitable for both residential and commercial projects. Their COB technology provides smooth, continuous, dot-free illumination, while integrated DMX512 control allows precise colour selection, dimming, and dynamic lighting effects.

Common applications include:

  • Architectural feature lighting
  • Signage and illuminated lettering
  • Retail displays and shop fittings
  • Stage and entertainment lighting
  • Cove and accent lighting
  • Ceiling and wall feature lighting
  • Hospitality and restaurant ambience
  • Hotel and bar lighting
  • Exhibition stands and trade show displays
  • Reception desks and commercial interiors
  • Display cabinets and shelving
  • Decorative furniture lighting
  • Event and venue lighting
  • TV units and entertainment areas
  • Residential feature lighting
  • DIY dynamic lighting projects


With their 12V design, COB technology, and DMX512 control, these LED strips are ideal for applications requiring smooth, continuous illumination combined with programmable colour and dynamic lighting effects. They can be used with compatible DMX controllers and power supplies, providing flexible control for both functional and decorative lighting installations.

12V DMX COB LED Strip Lights

Our 12V DMX COB LED Strip Lights provide smooth, continuous, dot-free illumination with advanced DMX512 control, making them ideal for both decorative and dynamic lighting applications. COB (Chip-on-Board) technology delivers a seamless line of light, while integrated DMX control allows for precise colour selection, dimming, and dynamic lighting effects. They are perfect for architectural features, signage, retail displays, entertainment spaces, hospitality venues, feature lighting, and residential or commercial installations.

Colours & Diagrams

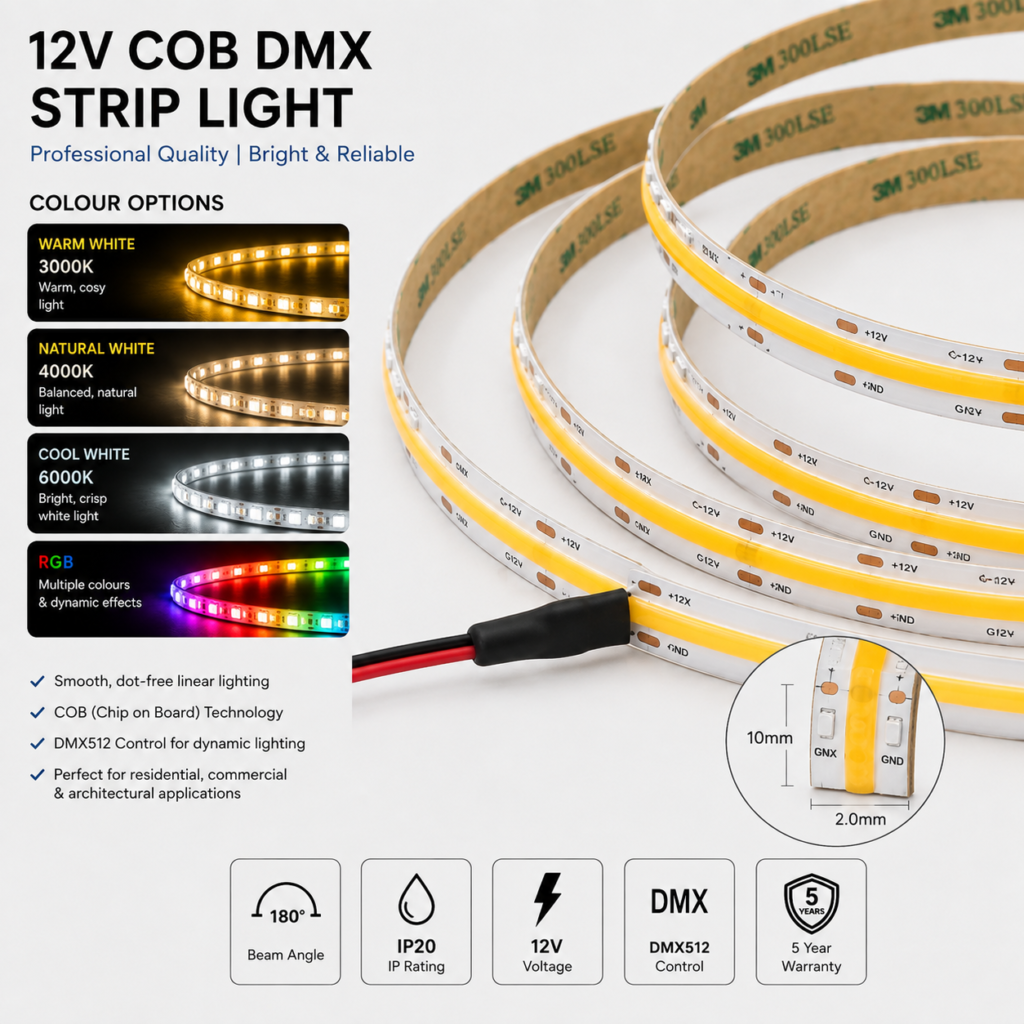
12V COB DMX SMD strip lights are available in a variety of colour temperatures and colour options, including:

  • Warm White (3000K): Creates a soft, warm ambience ideal for residential, hospitality and decorative applications.
  • Natural White (4000K): Offers a balanced, natural appearance suitable for general lighting and everyday applications.
  • Cool White (6000K): Produces a crisp, bright white light ideal for modern, display and task lighting applications.
  • Red: Provides a bold red light ideal for decorative, accent and signage applications.
  • Green: Creates a vibrant green effect suitable for decorative, architectural and feature lighting.
  • Blue: Produces a cool blue effect ideal for decorative, entertainment and accent lighting.
  • Yellow: Offers a warm yellow glow suitable for decorative and feature lighting applications.
  • RGB: Provides multiple colour options, allowing you to create dynamic and customisable lighting effects.
 

12v cob dmx led strip lights


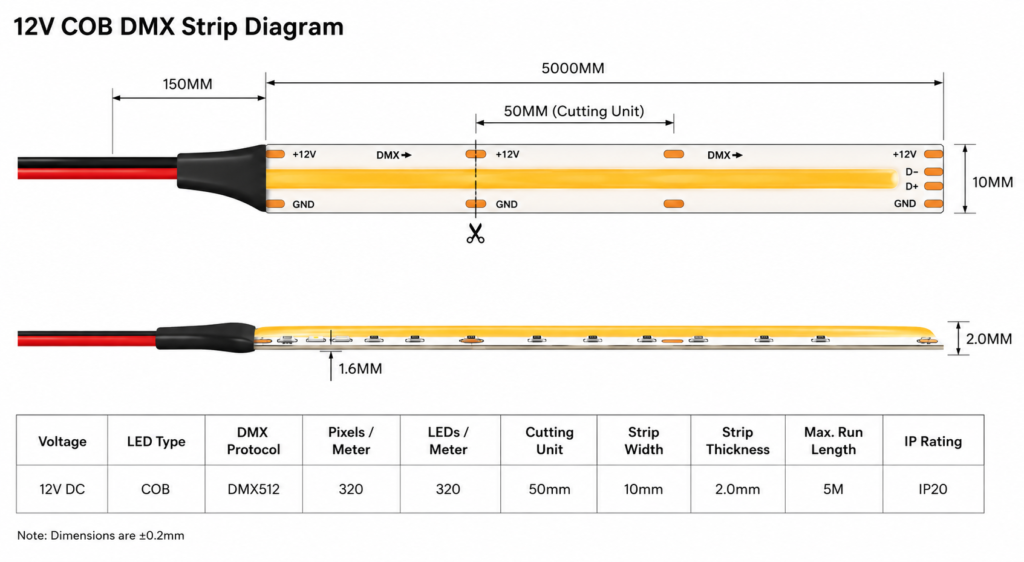
12V COB DMX Strip Diagram
Diagram of a 12V COB DMX LED Strip Light showing its cut intervals and physical dimensions. The 12V strip can be cut at the designated cut points. The strip features a slim, flexible COB profile suitable for a wide range of residential, commercial, signage, display, architectural, and dynamic lighting applications. Always cut only at the marked cut lines to ensure proper operation.
 

12v cob dmx led strip lights


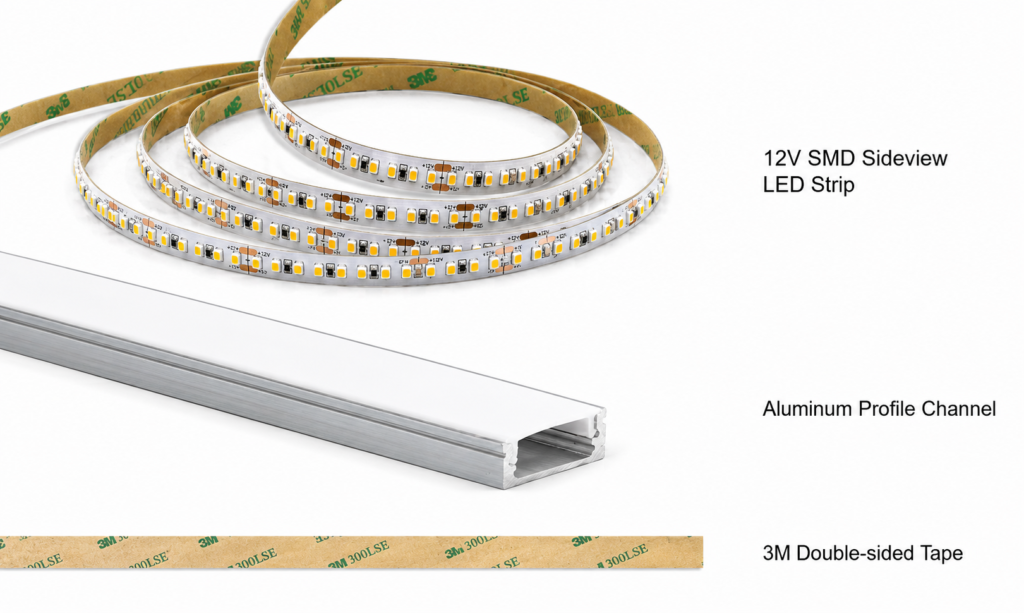
Illustration of the essential components for installing a 12V DMX COB Strip Light. The image shows a 12V DMX COB strip, an aluminum profile channel with diffuser, and the strip's pre-applied 3M double-sided adhesive tape. While the adhesive provides quick and easy installation, an aluminum profile is recommended to improve heat dissipation, protect the LED strip, create a cleaner finish, and help maximize the lifespan and performance of the lighting system.
 

12v smd side view strip lights


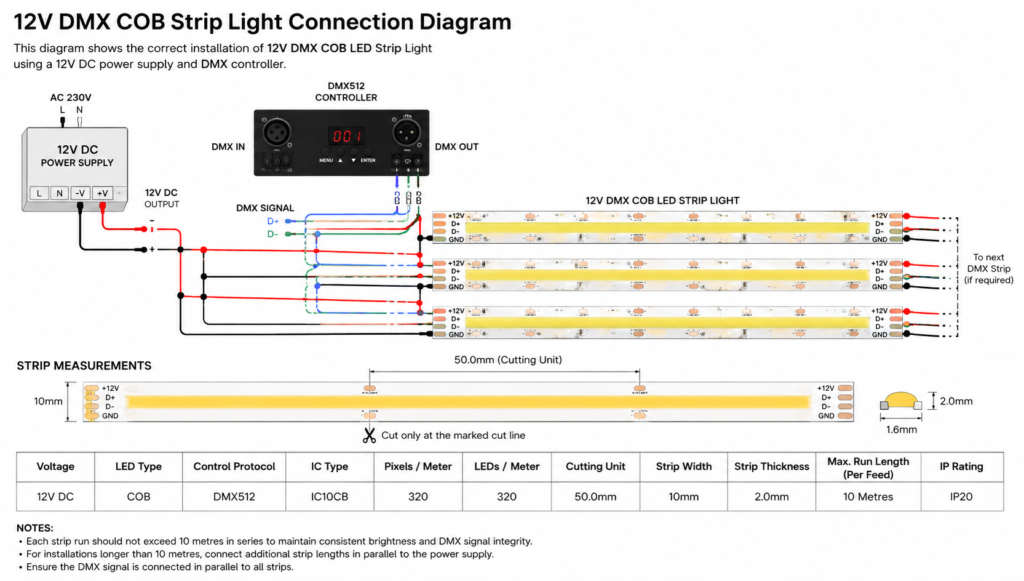
12V DMX COB Strip Light Connection Diagram

12V DMX COB LED Strip Light wiring diagram showing the correct installation method using a 12V DC power supply and compatible DMX controller. Each LED strip run should be connected according to the manufacturer's recommended maximum run length to maintain consistent brightness and reliable DMX signal transmission. For longer installations, connect additional strip lengths in parallel to the power supply and ensure the DMX signal is correctly connected between sections. This setup helps ensure smooth, continuous illumination, accurate colour control, and optimal performance across the entire installation.

 

12v cob dmx led strip lights


Specifications

Fresh Picks